
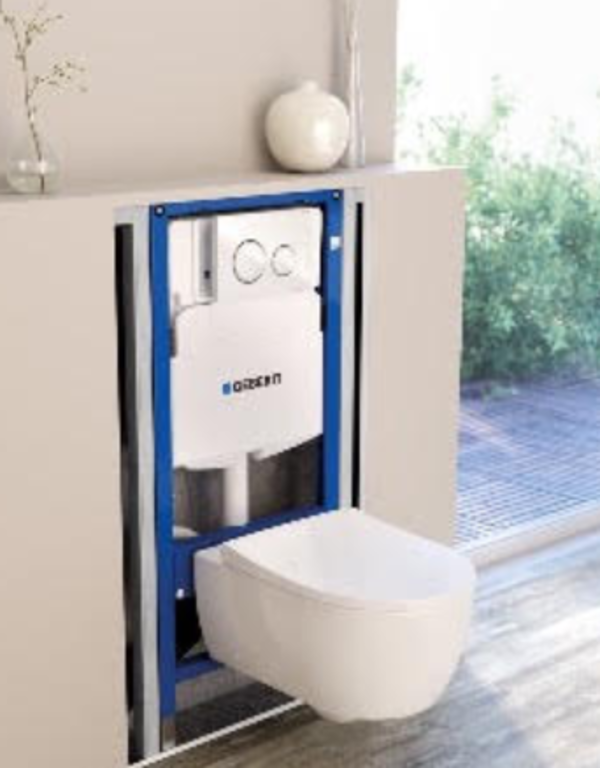
A concealed cistern can improve the appearance and cleaning access of a bathroom, but only when the frame, waste route, wall construction and service opening are planned before the finishes are installed. By the end, you will know how the system works, which frame and toilet arrangement suit your bathroom, what Chennai-specific checks matter, and what to confirm in an installation quotation.
Key takeaways
- Confirm finished-wall depth before choosing a concealed cistern frame.
- Choose wall-hung, floor-mounted or bidet support based on the bathroom layout.
- Keep the isolation tap and service opening accessible after tiling.
- Compare frame model, flush plate, warranty and installation scope in writing.
How a concealed cistern works behind the finished wall
A concealed cistern hides its flush tank inside a wall-mounted frame, which also supports a wall-hung toilet bowl. Its working parts are the water inlet, inlet valve and fill valve, flush valve or outlet valve, isolation tap, overflow protection, and removable flush plate.
Pressing the plate opens the flush valve; water leaves the tank through the waste outlet, while the fill valve restores the set water level.
| Feature | Concealed cistern | Exposed toilet cistern |
|---|---|---|
| Installation | Tank and pipe connections sit behind a finished wall | Tank remains visible above or directly behind the toilet |
| Appearance | Creates a cleaner wall and more open floor area | Shows the tank, supply pipe and exposed connections |
| Maintenance | Access is through the removable flush plate or service opening | The lid gives direct access to internal parts |
| Repair consequence | A leak can stay hidden and repairs become destructive if access is blocked | Leaks are easier to see and reach |
| Toilet support | A structural frame carries a wall-hung bowl | The floor carries a close-coupled toilet |
Keep the access opening usable after tiling; the inlet valve, fill valve, flush valve and isolation tap must be reachable without breaking the wall. Seal the waterproofing membrane continuously around the frame and pipe penetrations, because grout alone cannot stop a concealed leak. Properly clipped supply pipes also reduce vibration and water-hammer noise.
Choosing between wall-hung, floor-mounted and bidet frames
Choose the frame by the ceramic’s load path: a Geberit wall-hung toilet needs a structural carrier fixed to the floor and, where designed, the supporting wall. Tiles or a tile-faced partition cannot carry the bowl safely.
| Application | Suitable Geberit frame type | Key check |
|---|---|---|
| Wall-hung toilet | Wall-hung WC installation frame | Confirm floor and wall fixing, finished pan height, waste outlet and finished-wall depth |
| Back-to-wall toilet | Frame for a floor-standing WC with concealed cistern | Confirm that the ceramic stands on the finished floor; the frame supports the cistern and services, not the bowl |
| Bidet | Bidet frame for a wall-hung bidet | Confirm bidet fixing centres, waste position, water connections and the required mounting height |
A wall-hung toilet leaves the floor continuous, so cleaning is easier and the pan height has more adjustment. The price is higher because the carrier, wall build-up and finishing must be installed accurately; a floor-mounted toilet places its load directly on the floor and usually involves less structural work.
Do not substitute a standard WC frame for a bidet frame. Bidets use different fixing positions and connection layouts, and forcing the wrong frame can leave the ceramic misaligned or inaccessible for service.
For a back-to-wall toilet, choose the frame after confirming the ceramic manufacturer’s fixing and outlet dimensions. In the quotation, separate the cistern, frame, actuator plate, bowl or bidet, seat, fixing set, connectors, isolation valve and installation work; a low price can exclude the carrier or wall construction.
Chennai fit checks before you select the frame
Measure the finished wall thickness and shaft depth before ordering a concealed frame. Use the planned surface, including render, waterproofing, adhesive and tile, rather than the unfinished masonry dimension.
1. Record the finished floor level and mark the required pan height, frame top and flush-plate position. A wrong floor reference can leave the toilet too high or force costly alterations after tiling.
2. Confirm the drainage route and soil-pipe gradient from the pan outlet to the stack or inspection point. Check the waste outlet height, bends and inspection access; a badly aligned or flat pipe can cause recurring blockages even when the cistern works correctly.
3. Identify whether the support is masonry or drywall. A wall-hung toilet needs a structural carrier fixed to the floor and/or structural wall, not a tile-faced partition. Verify that the wall thickness can contain the frame, waste pipe and service connections.
4. Mark cold-water entry, the isolation tap, electrical conduits and any nearby pipework. Clip supply pipes securely and allow for pressure control; loose pipes or water hammer create noise behind a closed wall.
5. Detail continuous waterproofing around the frame, pipe penetrations and the floor-to-wall junction. Tile grout is not a waterproofing membrane, and a concealed leak can remain unnoticed longer than an exposed one.
6. Keep the flush plate or actuator opening removable. Confirm that the inlet valve, fill valve, flush valve and isolation tap are reachable without removing tiles or breaking the finished wall.
The correct installation sequence and service access
Close the wall only after the frame, pipework and cistern have passed separate checks. A removable flush plate must remain the planned service opening; hiding the mechanism behind tile turns a routine valve replacement into demolition.
1. Fix the frame to the structural floor and wall, set the bowl height, and confirm that the waste connector has the correct fall and alignment. Keep an inspection point accessible where the soil pipe requires one.
2. Connect the supply with an isolation valve, then test the pipework for leaks at the building’s working pressure. Check that the inlet valve and fill valve shut cleanly without continuous topping-up.
3. Operate the flush valve repeatedly and inspect every joint, the cistern, waste connection and bowl outlet. Test both flush settings if the actuator provides them, and correct weak flushing or leaks before covering anything.
4. Apply a continuous waterproofing membrane around the frame, supply and waste penetrations, and the floor-to-wall junction. Grout is not waterproofing; a concealed leak can damage the wall before anyone sees it.
5. Install the access carrier and the specified actuator plate, confirming that the plate is removable and its rods or cables move freely. Do not substitute a plate from another manufacturer or product family.
6. Tile around, not permanently over, the flush plate opening. Remove the plate after finishing to verify access to the fill valve, flush valve and isolation valve, then record the model and keep replacement seals available.
What to compare in a Geberit dealer quotation
A suitable quotation links the cistern to your building, not just to a Geberit model number. Ask the Geberit dealer in Chennai to record pressure at the bathroom during peak demand, water-supply interruptions, inlet connection, finished-wall thickness, pan height and waste route. At Lifestyle Galleria, use the same written checklist for every quotation.
Ask for these details before approving the order:
- State the minimum operating pressure and maximum operating pressure from the exact model’s technical sheet.
- Identify whether the proposed dual-flush 6/3 litres setting suits the selected bowl; nominal litres do not guarantee clearance with the smaller flush.
- Note the water-quality risk, including sediment or hard-water deposits, and the cleaning access for the inlet and outlet valves.
- Show service parts and installation cost separately, including the flush plate, isolation valve, frame, brackets and testing.
- Name the installer’s previous concealed-system work and include clipped pipework, pressure control and water-hammer prevention.
- For an electronic seat or sensor, price the dedicated circuit, socket position, residual-current protection and replacement access.
| Quotation item | Check before approval | Warning sign |
|---|---|---|
| Pressure | Measured peak pressure against the model limits | Dealer assumes the pump or tank is sufficient |
| Flush performance | Bowl, pipe layout and 6/3 litres setting assessed together | Flush volume is treated as a performance guarantee |
| After-sales | Local parts, labour and access route identified | Repairs depend on imported or unspecified parts |
| Site fit | Wall type, tile build-up and outlet dimensions recorded | “Standard installation” replaces measurements |
Frequently asked questions
How do you choose between wall-hung, floor-mounted and bidet frames?
Choose a wall-hung frame for a suspended bowl, a floor-mounted frame for a supported floor-standing toilet, and a bidet frame for wall-mounted bidet installations.
What should you check in Chennai before selecting a concealed cistern frame?
Check the available wall depth, finished floor height, drainage position, water inlet location, tile build-up and access for maintenance.
What is the correct installation sequence for a concealed cistern?
Set out the frame and services first, secure and test the frame, close the wall, waterproof and tile, then fit the flush plate and sanitaryware while preserving service access.
What should a Geberit dealer quotation include?
Ask for the exact frame model, compatible flush plate, cistern components, fixing hardware, delivery, installation, testing, warranty and exclusions.