The right kitchen sink must fit the cabinet, worktop, plumbing route and the way you wash dishes—not just the open space visible on the counter. By measuring the installation area and comparing bowl layout, mounting style, steel specification and fittings, you can reject sinks that look suitable but create problems after installation.
Key takeaways
- Measure the cabinet’s internal width and depth before selecting a sink.
- Match undermount, top-mount or flush-mount installation to your worktop.
- Choose bowl depth and layout around your washing and drainage habits.
- Check steel grade, thickness, drain position and included accessories.
Measure the Cabinet, Countertop and Clearance Before You Shop
A kitchen sink size fits only when the cabinet, cut-out and plumbing all agree. Start with the base cabinet measurement: open the doors and measure the internal cabinet width at its narrowest point, then measure the available front-to-back depth below the countertop. Leave room for the cabinet walls, clips and insulation.
Do not treat an 800 mm sink listing as an 800 mm cut-out. The manufacturer’s installation template takes priority because the rim width, corner radius and mounting method change the opening. Check your countertop depth, the distance to the backsplash or wall, and the space behind the sink for the tap hole.
Before ordering, record these possible obstructions:
- Drawer, pull-out bin or cabinet partition below the bowl
- Waste trap position and the route to the drain
- Dishwasher connection and plumbing access
- Window, wall or backsplash near the tap and handle
- Clearance for the bowl depth and installation clips
Use this comparison when checking the available space:
| Measurement | What to check | Why it matters |
|---|---|---|
| Internal cabinet width | Narrowest clear width between cabinet sides | A wide rim cannot compensate for a cabinet that is too narrow |
| Countertop depth | Front edge to wall or backsplash | The bowl and tap platform must fit without hitting the wall |
| Cut-out space | Template dimensions, including corner radius | The nominal sink size is not the cutting size |
| Below-bowl clearance | Trap, drawers, bins and partitions | A deep bowl can fit above but block storage or drainage below |
A deep bowl suits large cookware, but it also reduces storage clearance and makes you bend farther. Compare its depth with your standing height and the actual plumbing space before choosing by appearance.
Match the Mounting Style to Your Worktop and Replacement Plans
Choose the installation type by your worktop material and your replacement plans. A top-mount sink, also called a drop-in sink, is the safer choice for laminate because its rim covers and protects the cut edge. An undermount sink demands a continuous, water-resistant worktop with a sealed, finished edge.
| Option | Suitable worktop | Replacement implications |
|---|---|---|
| Top-mount sink | Laminate, timber, stone and most solid surfaces | Easiest to remove and replace because the rim sits above the worktop |
| Drop-in sink | Vulnerable worktops where the cut edge needs coverage | A replacement with the same or larger rim can hide the old opening |
| Undermount sink | Sealed granite, quartz or another continuous water-resistant surface | Harder to replace; the new bowl must match the cut-out and support system |
| Flush-mount sink | Precisely recessed stone or solid-surface worktops | Difficult to alter because the rim sits level with the worktop recess |
For an undermount sink, silicone seals the joint but must not carry the entire load. Use the specified brackets or frame, especially with heavy ceramic, fireclay or composite bowls; otherwise a full sink can pull away and leak.
Before ordering, use the manufacturer’s installation template rather than the nominal sink size. Rim width, corner radius and mounting method change the cut-out, so an apparently matching replacement may leave gaps or fail to cover the previous opening.
Choose the Bowl Layout and Depth for Your Daily Washing Routine
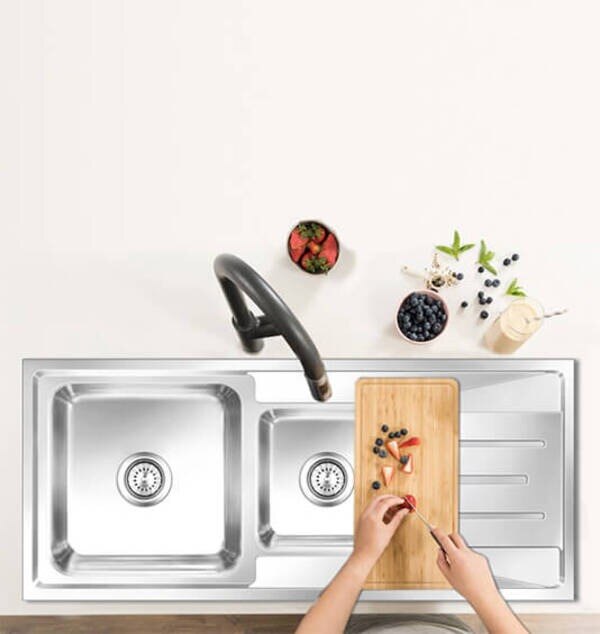
Choose a single bowl sink if you regularly wash large pots, pressure cookers or baking trays; choose divided bowls when separating washing from rinsing matters more than uninterrupted width. A 1.5-bowl sink gives you a smaller side compartment for rinsing vegetables, draining cutlery or keeping a sponge away from dirty cookware.
| Option | Best for | Main compromise |
|---|---|---|
| Single bowl sink | Large cookware and flexible washing space | Washing and rinsing cannot happen in separate compartments |
| 1.5-bowl sink | A main bowl plus a small rinsing or draining area | The secondary bowl is too small for most cookware |
| Double bowl sink | Washing in one bowl while rinsing or soaking in the other | Each bowl is narrower, so wide pans may not lie flat |
Check the sink bowl depth against your standing height and the plumbing below. A deeper bowl creates clearance for tall vessels and reduces splashing, but it makes you bend farther and can interfere with the waste trap, pull-out bin or drawers. A shallow bowl is easier to reach but leaves less room for stacked dishes.
Before ordering, place your largest frequently washed vessel across the proposed bowl width and depth. If it touches the divider or cannot sit flat, choose a wider single bowl sink; if your routine involves constant soaking and rinsing, the separation of a double bowl sink will save repeated transfers.
A 1.5-bowl sink suits mixed routines where you need separation without giving up the main bowl’s usable width.
Read the Steel and Thickness Specifications Instead of Judging by Appearance
Compare the specification sheet in this order: steel grade, sink gauge thickness, measured sheet thickness and construction details. A lower gauge number means a thicker sheet, so a 16-gauge sink uses more metal than an 18-gauge sink; do not treat gauge as the complete quality test.
| Grade | What the specification indicates | Practical decision |
|---|---|---|
| 202 stainless steel | Lower-cost alloy with less corrosion resistance than 304 | Reject it for a busy kitchen exposed to moisture, salt or acidic food residue |
| 304 stainless steel | Standard domestic grade, commonly labelled 18/8 or 18/10 | Suitable for most home kitchens |
| 316 stainless steel | Better chloride resistance than 304 | Choose it when salt air or aggressive chemicals create unusually high exposure |
| Gauge and thickness | Lower gauge means thicker sheet; the actual millimetre thickness confirms the claim | Compare both figures, then check bowl support and reinforcement |
Ask for the actual thickness in millimetres, not only a gauge number. Bowl geometry, pressed corners, underside reinforcement, weld quality and bonded sound-deadening pads all affect rigidity and noise; a thick sheet with poor pressing can still flex.
Do not use a magnet as a grade test. Forming and welding can make 304 stainless steel slightly magnetic, so magnetic attraction does not prove that the sink is 202 stainless steel or inferior. Also inspect the underside for neat welds, firmly bonded pads and accessible areas for leak checks.
Compare the Details That Decide Fit, Drainage and Long-Term Usability
Before ordering, compare the sink’s installation template, connection points and support requirements against your actual cabinet and wall conditions. A nominal sink size is not its cut-out size, and a small mismatch can leave an undermount joint poorly sealed or a drawer unusable.
| Detail | What to compare | What can go wrong |
|---|---|---|
| sink bowl radius | The template’s corner radius and your countertop cut-out | A tight radius leaves gaps; a different radius prevents the sink from seating |
| waste outlet position | Outlet location, trap route and the cabinet’s drawers or partition | The trap becomes inaccessible, or the drawer strikes the plumbing |
| overflow provision | Overflow opening, connection hose and compatible waste fitting | An unconnected overflow leaks into the cabinet or offers no protection |
| tap-hole layout | Hole spacing, tap reach and handle movement beside the wall or backsplash | The handle hits the wall, or the spout misses the bowl |
| drainer position | Left or right orientation against the dishwasher and preparation area | Wet dishes block access or water drains across your work zone |
Ask the dealer to supply the specified basket strainer, waste outlet and trap as a compatible set; improvised reducers create slow drainage and hidden leaks. For an undermount sink, require mechanical brackets or a support frame as well as sealant, especially with heavy ceramic, fireclay or composite models.
Lifestyle Galleria can help you check the manufacturer’s template against your measured cabinet before the installation is handed over. Confirm the final bowl depth too: extra clearance for cookware is useful only if the trap, pull-out bin and drawer still operate.
Frequently asked questions
What should you measure before buying a kitchen sink?
Measure the cabinet’s narrowest internal width, the available front-to-back depth and the countertop cut-out area. Allow space for cabinet walls, mounting clips, insulation and plumbing.
Which kitchen sink mounting style should you choose?
Choose a mounting style that suits your worktop and replacement plans. Top-mount sinks are easier to replace, while undermount sinks require a suitable solid countertop and precise installation.
How do you choose the right sink bowl layout and depth?
Match the bowl count, bowl width and depth to your daily washing routine, cookware size and available cabinet space. Check that the drain position leaves room for the waste pipe.
What steel specifications matter when comparing kitchen sinks?
Check the stainless-steel grade and sheet thickness on the specification sheet instead of judging the finish alone. Also compare the drain design, overflow, sound insulation and included fittings.